
I loved meeting Jennifer Segal at a writer’s meeting and hearing about her cookbook ventures. Her Once Upon a Chef cookbooks and recipe website are amazing – great recipes, easy to follow, and memorable. I highly recommend you subscribe to her newsletter to receive periodic updates and scrumptious recipes. I’m still thinking about those Sweet, Spicy, Salty Pecans (a.k.a. Crack Nuts)! Spicy sweet hot goodness! I asked her to share a comfort recipe for the holidays, and if Apple Pie doesn’t feel like a hug on a cold day, I’m not sure what does! Enjoy!
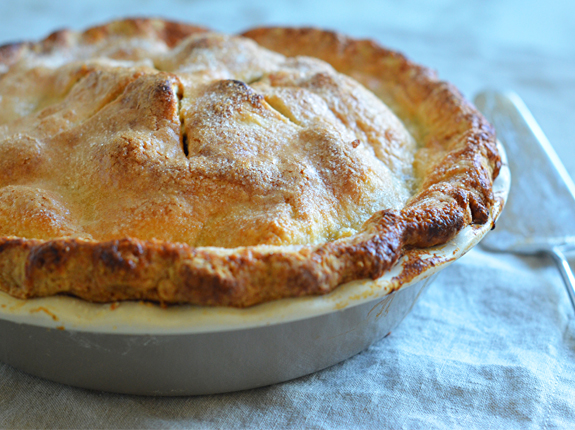
Perfect Apple Pie
Servings: 8
INGREDIENTS
FOR THE CRUST
- 2-3/4 cups all-purpose flour, spooned into measuring cup and leveled with a knife
- 3 tablespoons sugar
- 1 teaspoon salt
- ¼ teaspoon baking powder
- 14 tablespoons cold unsalted butter, sliced into 1-inch pieces
- ¼ cup cold vegetable shortening, in 4 pieces
- 7 tablespoons ice cold water
FOR THE FILLING
- 3½ pounds baking apples (see note), peeled, cored, sliced ¼-inch thick
- 1 teaspoon lemon zest and 1 tablespoon lemon juice, from 1 lemon
- ½ cup granulated sugar
- 6 tablespoons packed dark brown sugar
- Heaping ¼ teaspoon salt
- ¼ teaspoon cinnamon
- 2 tablespoons all-purpose flour
- 2 tablespoons cornstarch
FOR BAKING
- A beaten egg, cream, or milk, for brushing over crust
- 2 tablespoons granulated sugar, for topping the pie
INSTRUCTIONS
FOR THE CRUST
- Combine the flour, sugar, salt, and baking powder in the bowl of a food processor fitted with the metal blade. Pulse a few times to combine. Add the pieces of butter and shortening and pulse until the mixture is crumbly with lots of pea and chickpea-size clumps of butter and shortening within.
- Add the water and pulse until the mixture is evenly moistened and very crumbly. Dump the dough crumbles onto a work surface and divide into two piles, with one pile about 15% bigger than the other (13 oz and 11.5 oz). Make two balls of dough and pat each one into a 5-inch disc. Wrap the discs in plastic and refrigerate for at least 45 minutes.
- Take the larger disc of dough out of the refrigerator. Dust your work surface lightly with flour and place the dough on top; sprinkle a little flour over the dough. Use your hands to quickly knead the dough into a soft and malleable disc (don’t overwork it; you want it just supple enough to roll).
- Roll the dough, adding more flour as necessary under and on top of the dough so it doesn’t stick, into a 13-in circle. Carefully drape the dough over the rolling pin and transfer it to a 9-in deep-dish pie pan (it should be at least 1-1/2 in deep). Gently fit the dough into the pan, easing it inwards rather than stretching it outwards. Trim the edges to 1/2 inch beyond the lip of the pie pan. Turn the edges under to create a rim on the crust. Press the rim against the lip of the pan, forming it into an even edge. Use any scraps to patch in any tears or thin areas. Place the crust in the freezer for at least 15 minutes while you heat the oven.
- Preheat the oven to 375°F. Set an oven rack in the middle position.
- Remove the pie crust from the freezer and place on a baking sheet (this makes it easy to move in and out of the oven). Cover the crust with a piece of parchment paper and fill it with dried beans or pie weights. Bake for 20 minutes. Take the crust out of the oven; remove the parchment paper and beans/pie weights and tent the edges with a few strips of aluminum foil. (The foil will protect the edges from getting too dark.) Bake for another 20 minutes, until the dough is dry and golden. Don’t worry if the bottom puffs up; just press it down gently with a flat spatula, such as a pancake turner, taking care not to puncture it.
- Increase the oven temperature to 425°F.
FOR THE FILLING & BAKING
- Meanwhile, combine the apples, lemon zest, lemon juice, granulated sugar, brown sugar, salt, and cinnamon. Toss until the sugar is dissolved and the apples are evenly coated. Let sit for at least 30 minutes.
- Drain the apples, collecting the syrupy juice in another bowl. Pour the syrupy juice into a 2-cup microwave-safe liquid measuring cup. Take note of the quantity and then heat on high power in the microwave, checking frequently, until the syrup is reduced by half. This will take about 4 minutes but keep a close eye on it as all microwaves are different. You don’t want to cook it for too long, or it will turn into sticky caramel (see note below on how to correct this if it happens). The syrup should be just slightly thickened and still pourable. (Alternatively, you can boil the juices in a small pan on the stove.)
- Add the syrup back to the apples, along with the flour and cornstarch; toss to combine.
- Take the other piece of dough out of the fridge and roll into an 11-inch circle, using the same process described above. If necessary, use a little dough to patch up any holes in the bottom crust. Add the apple filling to the baked pie shell, compacting the apples as tightly as possible. (Too many air pockets will cause the crust to dome, creating a gap between the apples and the crust.) Place the rolled dough over top. Crimp the edges with a fork or flute with your fingers, sealing the top and bottom crust together. Work quickly, dusting your fingers with flour as necessary, as the heat from the pie pan will soften the dough.
- Brush the top crust with the beaten egg (or cream or milk). Sprinkle the remaining 2 tablespoons sugar over the top crust. Cut a few slits in the top crust to allow the steam to escape.
- Bake for 15 minutes, then reduce the heat to 375°F, and bake for an additional 45 minutes, or until the top is golden and the filling is bubbly. Let the pie cool completely on a wire rack before cutting, about 4 hours.
- Note:Be sure to use baking apples that hold their shape when cooked, such as Honeycrisp, Jonagold, Fuji, Granny Smith, or Golden Delicious. And use a mix of different varietals for the best flavor.
- Note:If you accidentally over-reduce the syrup and it seizes up when you pour it over the apples, transfer the apple mixture to a large sauté pan and cook over high heat until the caramel melts. Let cool completely in the fridge before proceeding with the recipe.
- Freezer-Friendly Instructions:The pie can be frozen for up to 3 months before or after baking it. (If freezing it unbaked, hold off on brushing the top crust with the beaten egg and sprinkling it with sugar; you can do that right before baking.) If baked, let it cool completely and place it in the freezer uncovered. When fully frozen, wrap the pie securely in foil and freeze. If the pie is unbaked, wrap it securely in foil and freeze. When ready to serve, proceed with baking instructions above (pie is likely to take a bit longer in the oven).
Editor’s Note: Thank you Jennifer! Check out more MomTastic recipes on our Lifestyle & Food page.


Leave A Comment